Virtual Queue Management

Who can use this feature?
Dock Scheduler + add-on: Virtual queueWho can use the Virtual queue in your organization and under what conditions.
-
Applies to product lines: CargoON, TFF (Trans for Forwarders), TFC (Trans for Carriers) and Dock Scheduler.With the Dock Scheduler Schedules product purchased and the Virtual queue add-on enabled - additionally paid service, contact your guardian.
-
Roles (sending / view): warehouse manager, Dock Scheduler manager, storekeeper, security guard — SMS sending.
-
Access conditions:
- Dock Scheduler Schedules product is active + Virtual queue add-on enabled.
- The “Driver’s phone number” field is filled in the booking.
- Bookings in status Pre-booking or Confirmed (SMS sending is available only in these statuses).
With the Virtual queue you can manage the queue in front of the warehouse gate via short SMS messages to the driver. You can call the driver to the gate, ask them to wait, allow entry, send a custom message, or remove them from the queue. The feature operates within the booking phase before entry and saves the full sending history.
In this article you’ll learn how to:
- enable and configure the Virtual queue (SMS templates, warehouse settings),
- send/resend SMS messages from a booking (also to two numbers),
- work with sending statuses, history and phone-number editing.
Enable and configure the Virtual queue
Below we’ll show you how to activate the add-on and prepare SMS message texts:
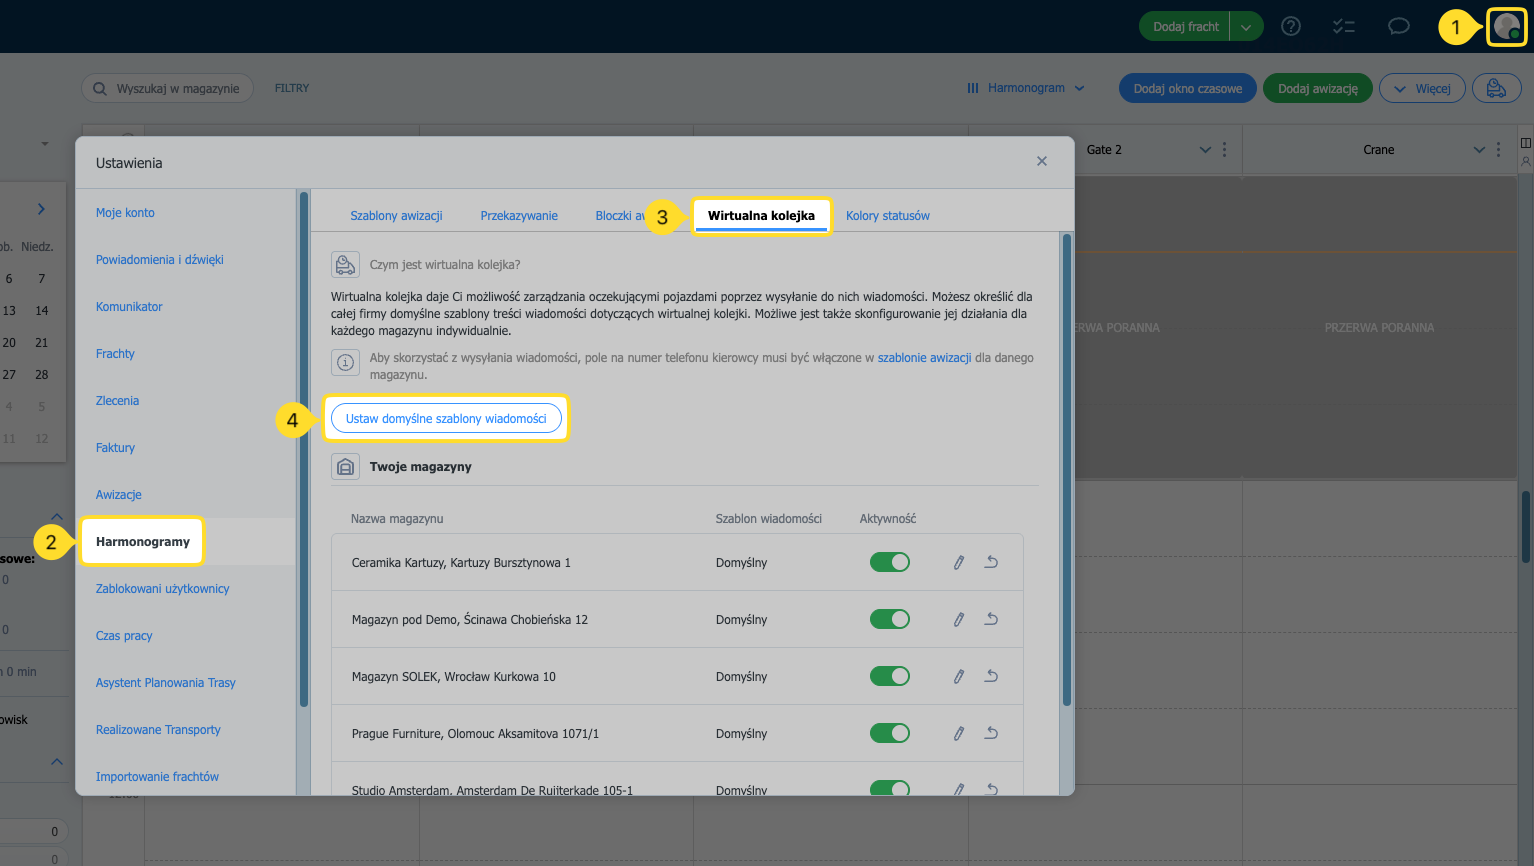
- Click your Avatar in the top right corner, then go to Settings.
- From the menu, select Schedules.
- Open the Virtual queue tab.
- Click Set default message templates.
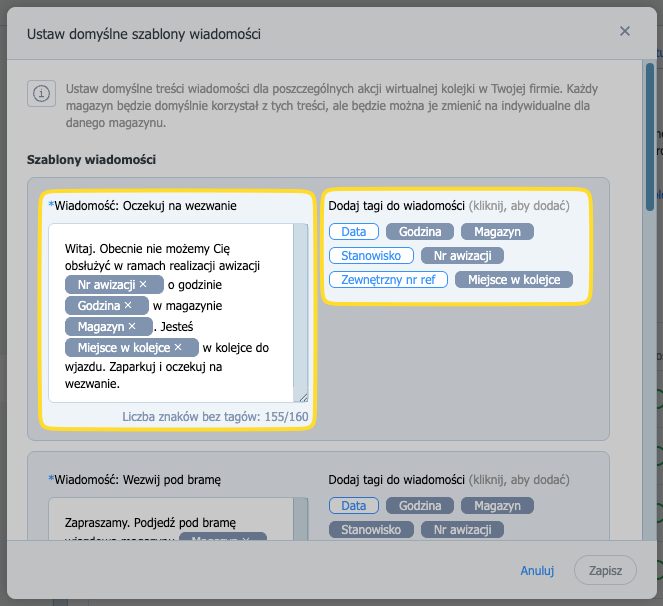
Here you can set your own message templates for:
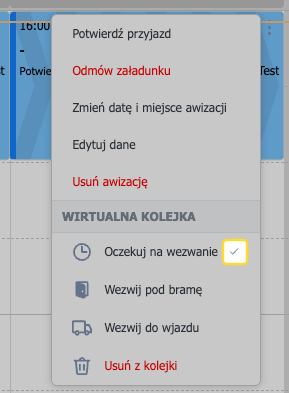
- Wait for call,
- Call to the gate,
- Call to entry,
- Remove from queue,
- Additional information.
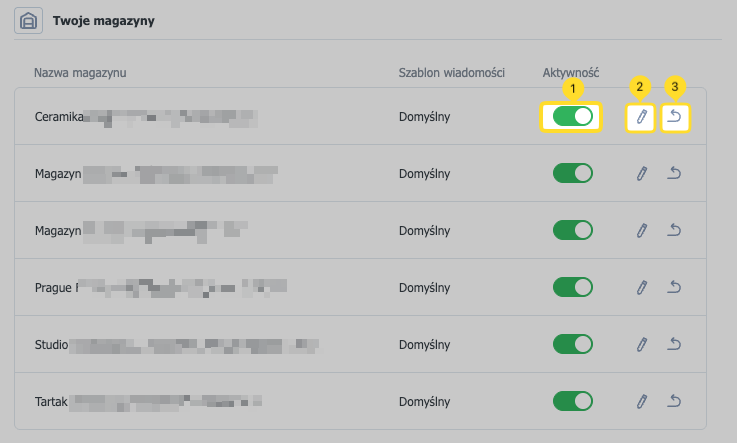
Next, in the list of available warehouses you can decide whether to keep the Virtual queue enabled for each warehouse and edit messages to tailor them per warehouse.
To do this:
- Turn on/off the Activity toggle next to the selected warehouse.
- For a warehouse, select Edit to set your own SMS messages for that warehouse.
- Click Restore to revert to the default version of the message (the company-wide default template, editable in the Virtual queue Settings).
Send an SMS message to the driver
Send a message from the booking menu. You can send a message multiple times, including the same type.
- Open a booking with status Pre-booking or Confirmed. Make sure the driver’s phone number is provided in the booking.
- Open the Details tab.
- Click Send message.
- Select a message from the list and send it.
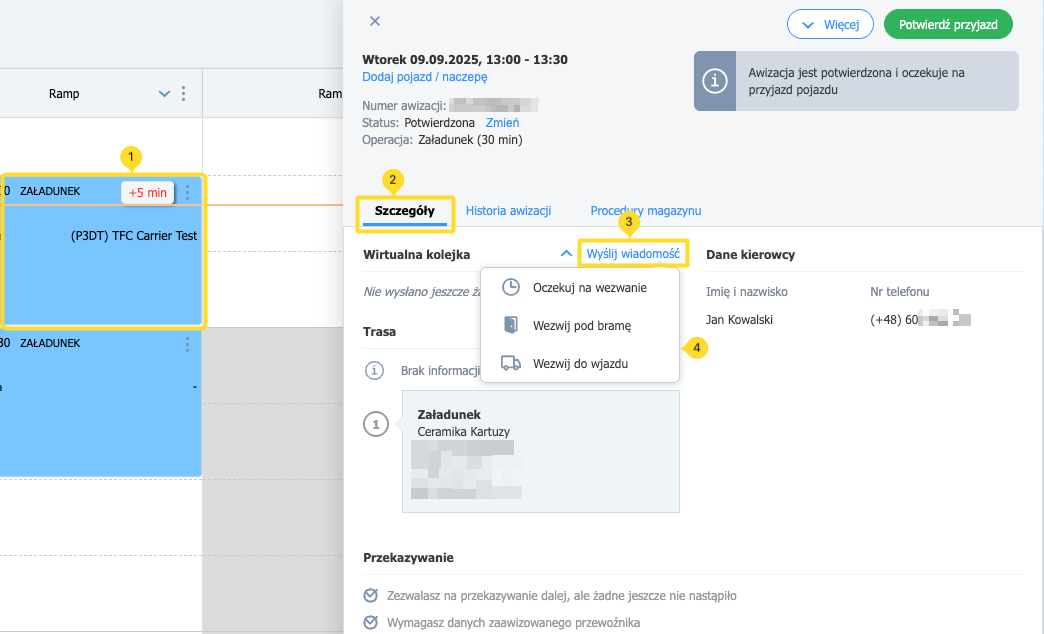
- Optionally — click the three dots (⋮) next to the booking on the schedule and choose a message to send.
Check the history of sent messages
- in the Virtual queue panel
In warehouses where the Virtual queue add-on is enabled, you’ll find a new truck icon that opens the panel for managing sent messages.
- Click the Virtual queue icon.
- Expand messages in the relevant status.
- Click the selected carrier, then Show messages.
You can also send a message here. - Click Send message and select the type from the list.
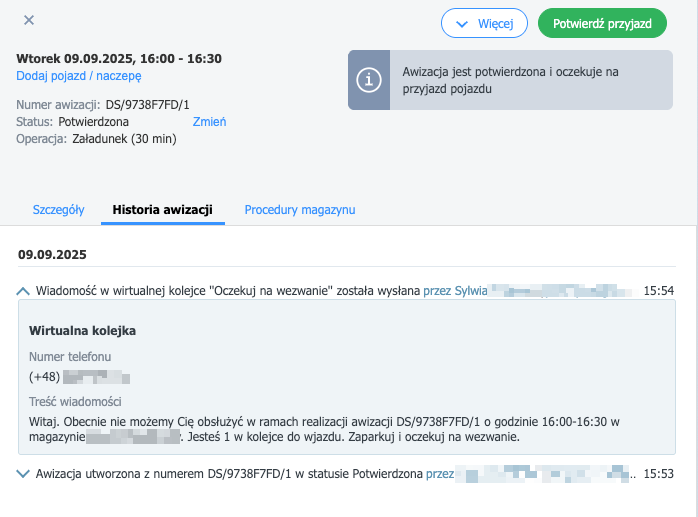
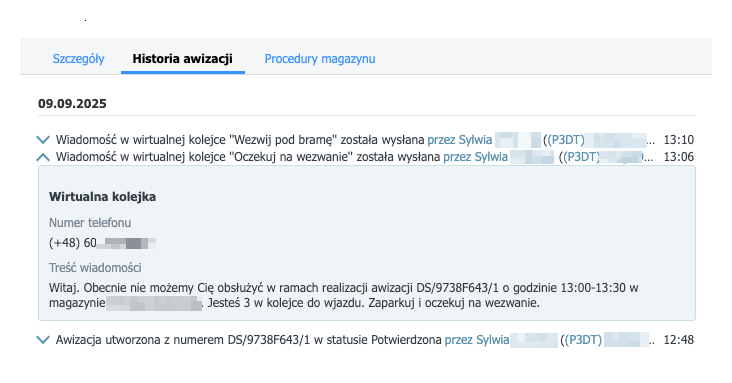
- in Booking history
- Open the booking details.
- Go to the Booking history tab.
- Expand the message content.
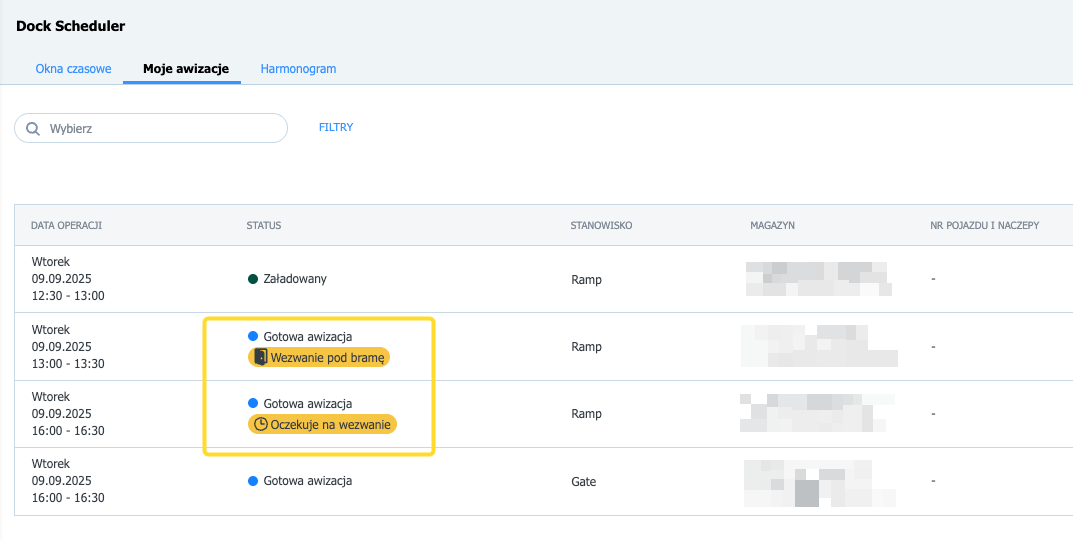
Message statuses and labels
- After a message is sent, the booking’s appearance in the schedule view changes (see the booking on the right in the screenshot).
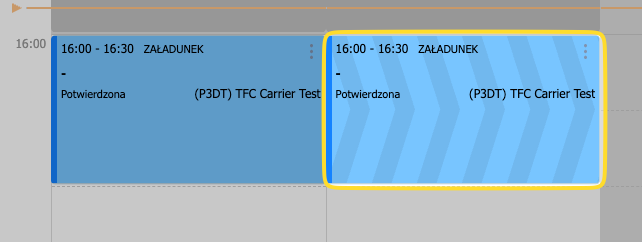
- In the booking details you’ll see the corresponding label: Wait for call / Call to the gate / Call to entry / Removed from queue.
- You can check the delivery status in several places:
- next to the sending time in the booking details,
- a checkmark icon when selecting the message,
- and in the Virtual queue panel in the details of the sent message.
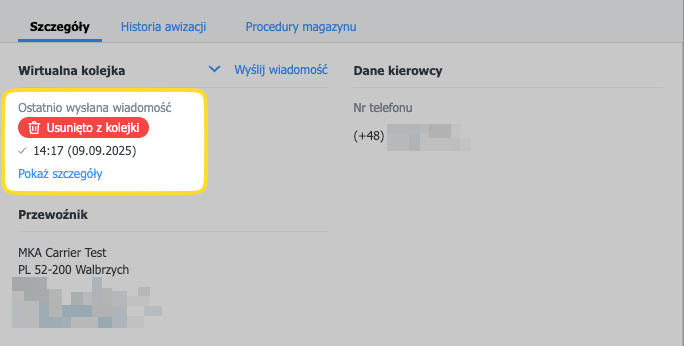
What the carrier sees
In the booking details, the carrier can view the last message (Show message) and the full history — without access to the Virtual queue settings tab.
- Statuses in the bookings list.
- Message contents in Booking history.
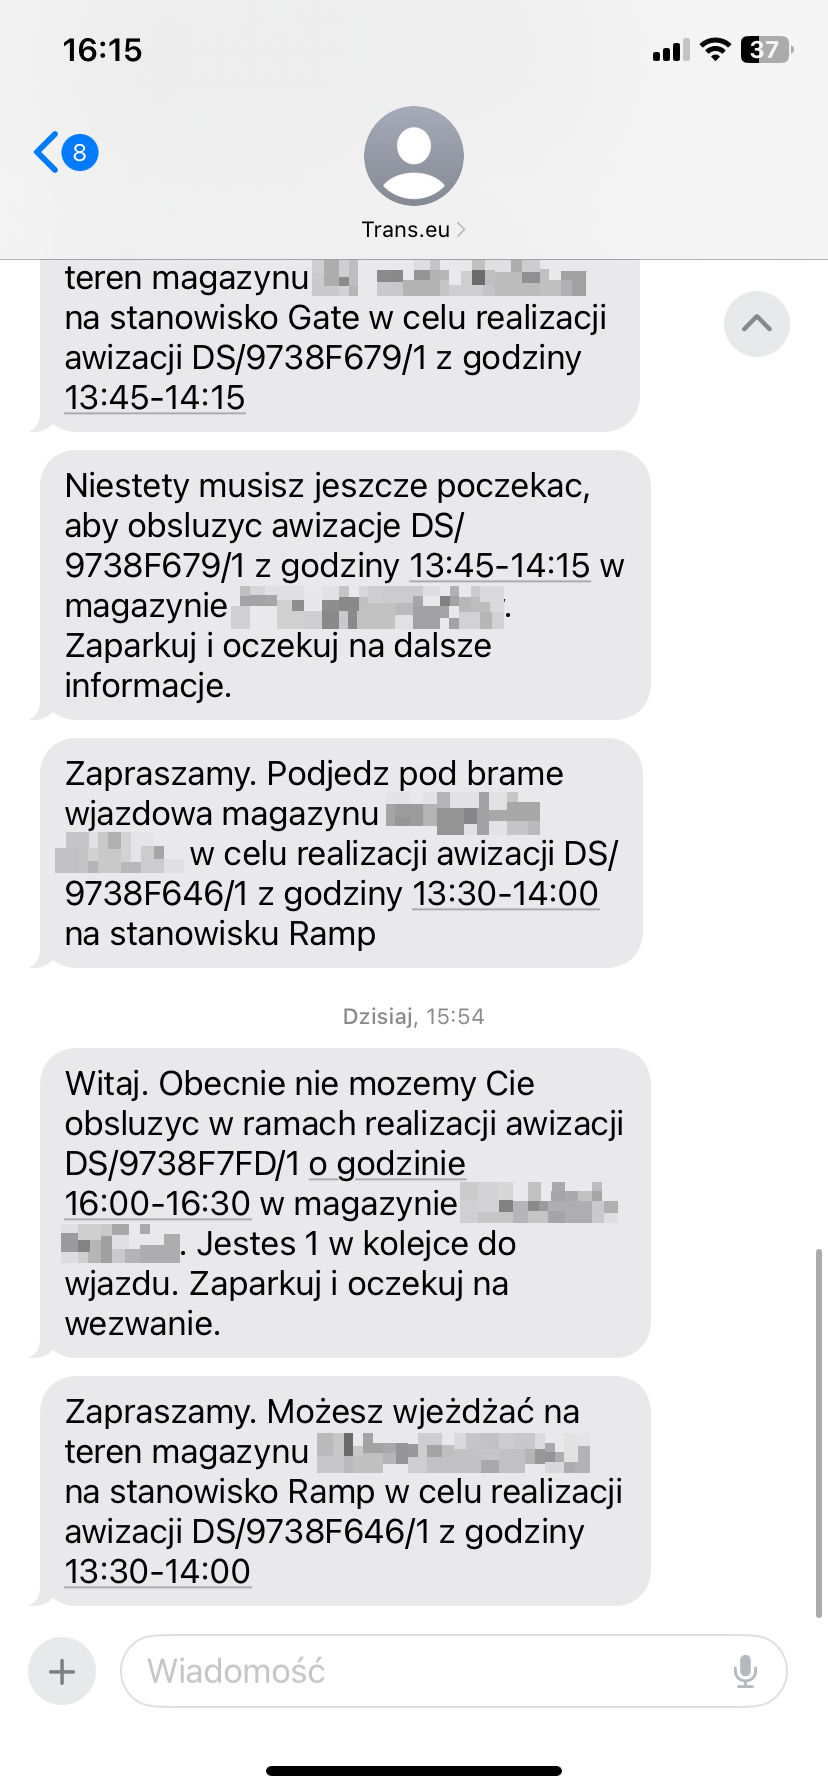
- The SMS message on the driver’s phone.
FAQ
Why can’t I see the option to send SMS?
2. Check the booking status — the feature is available only for pre-bookings and confirmed bookings. (read more about statuses)
3. Fill in the Driver’s phone number field in the booking details and try sending again.