untitled article
 Updated 2/9/24
by
Katarzyna
Updated 2/9/24
by
Katarzyna
|
Who can use this function? This function is available to users of the CargoON product line who have access to the Dock Scheduler product and the Schedules module. |
From this article you will learn:
- how to import time slots into the Schedules module using a .csv, .xls or .xlsx file,
- how to import bookings to the Schedules module using a .csv, .xls or .xlsx file,
- how to map values,
- how to prepare a match template.
Importing time slots and bookings with a file facilitates quick and easy creation of many bookings and time slots. This is a way to consistently transfer information from various sources to Dock Scheduler. With the importer, you can prepare your own templates as well, which will make your work more efficient.
Value mapping - tutorial
Before we move on to discussing import of time slots and bookings in detail, let's take a look at the Importer window when the loaded template is not automatically recognized.
Here's an interactive tutorial
** Best experienced in Full Screen (click the icon in the top right corner before you begin) **Importing time slots
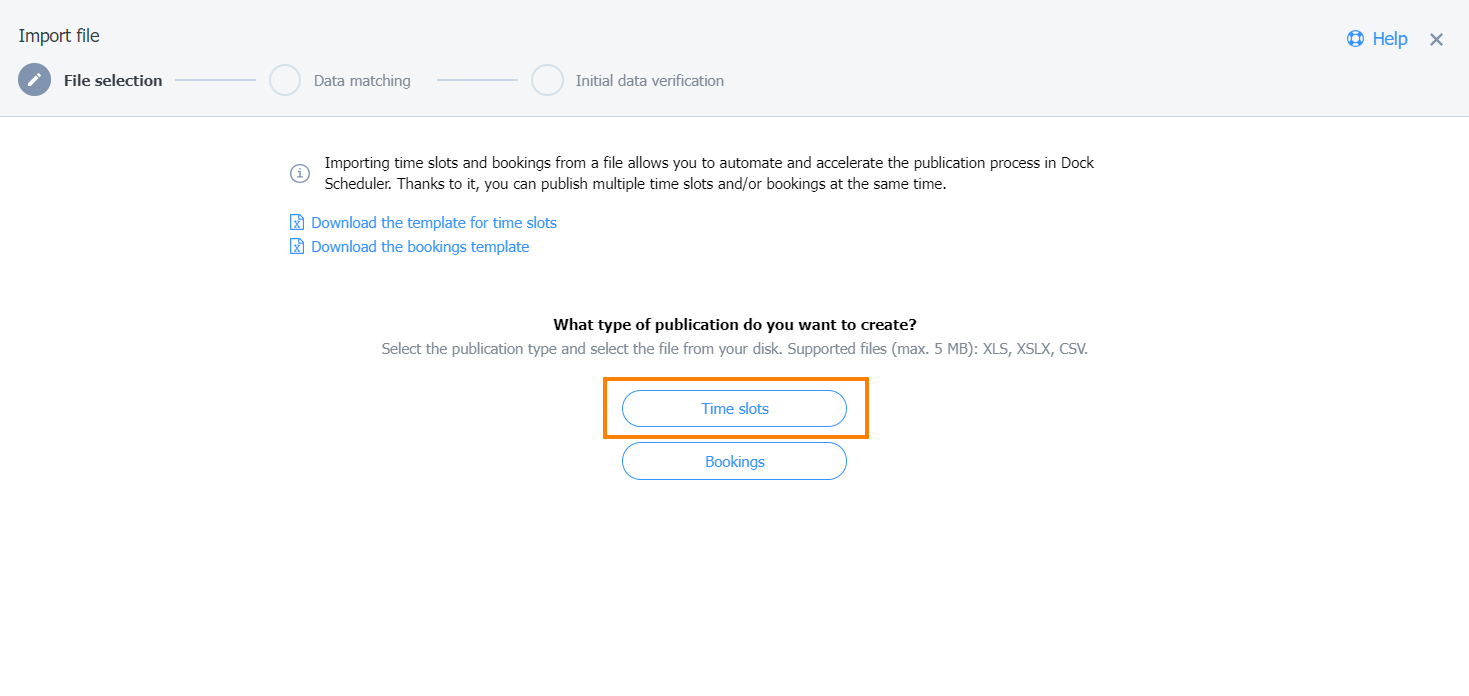
- Go to the Schedules module and click More.
From the drop-down list, select Import time slots or bookings.

- You will see the import window with the following elements:
- progress steps of the import (1),
- templates for time slots and bookings that you can download (2),
- buttons to create time slots or bookings (3),
- Help icon - after clicking it you will be redirected to this article (4).

- Click Download the template for time slots. The file will be downloaded to your device. Prepare it by entering data.
Required data for importing time slots
- Type of operation (loading/unloading).
- Operation time (make sure it is the same as in the warehouse settings).
- Carrier (tax identification number or Office-ID).
- Warehouse (warehouse name).
- Interval type (refers to hourly intervals: Cycle- daily hours of bookings, Interval- time from the first to the last hour of the day, or Daily - bookings during dock’s working hours.
- Hours for the time slot.
Range types
INTERVAL (time range from the specific hour on the first day to the specific hour on the last day) - For example, if we set the interval from Monday to Friday, and on the first day (Monday) the warehouse starts work at 8:00 and finishes on Friday at 16:00, bookings can be made within this time frame.
DAILY (bookings during working hours of the dock) - bookings can be made at any time during the day, but only during the working hours of the given dock. For example, if the dock operates from 7:00 to 19:00, bookings can be made during these hours.
- To import a file, click the Time slot button (File selection step).
- After uploading the file, the values included in the file will appear in the file import modal (Data matching step).
When you receive a notification that your data has been successfully verified, click Add time slots.

Example: unrecognized data
This message will appear when the data entered into the file is not correct.

You can correct the data directly on the Platform. After clicking on the field, you can edit it.

If you wish, you can also delete the selected time slot by clicking on the "x" icon on the left.
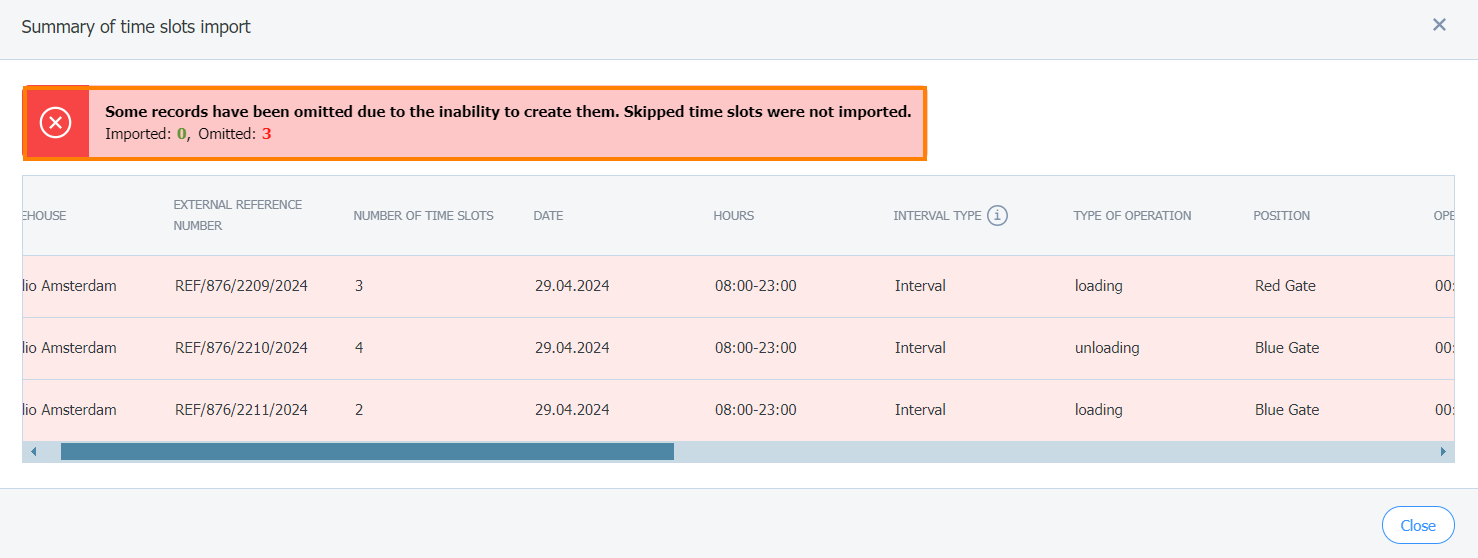
Example: partial data recognition
When some of the imported data is correct and some is not, you will see the following message:

To correct errors, click in the text field and edit it or delete the selected time slot.
If the data is entered correctly, click Add time slot.
- After clicking Add time slot, a progress bar will be displayed.

You can choose one of three actions: abort import, start a new import, or continue import in the background.
You will also receive notification that:
- files are being imported
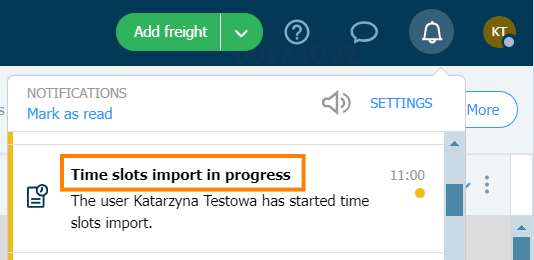
- import of the files has been finished.

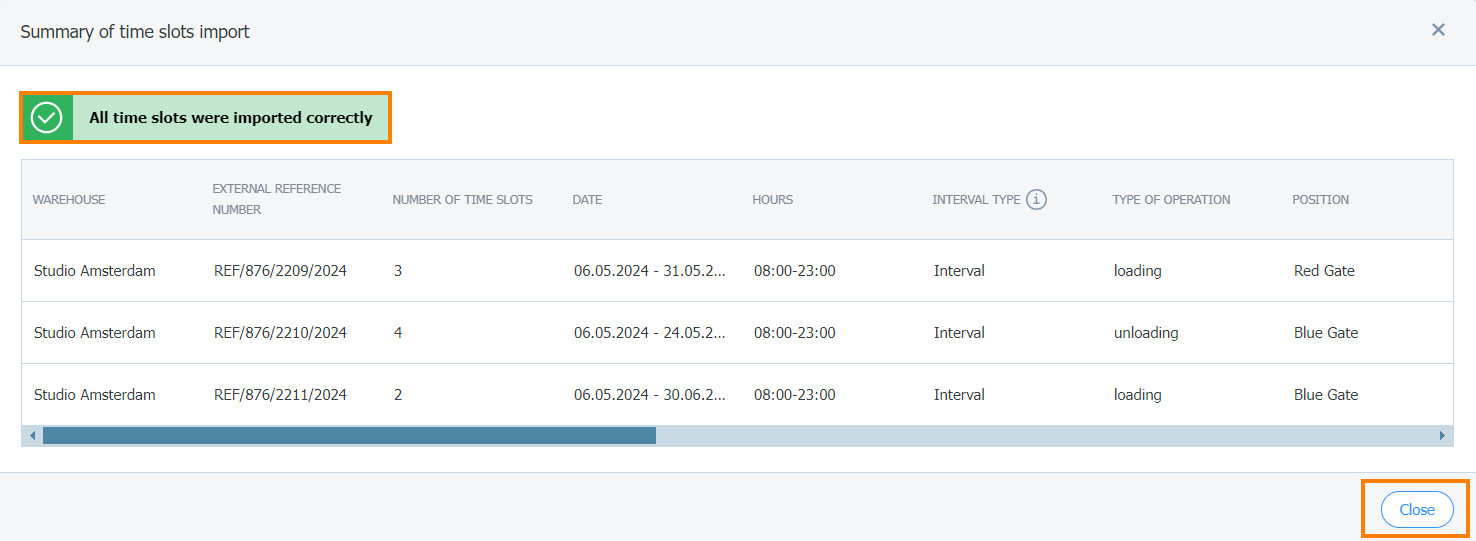
- Once the import is finished, you will see a summary. Click Close.
- To check whether time slots have been imported, click Schedules and then Time slots.

- Mark the dates on the calendar for which you have created time slots. The imported time slots will be displayed in the list.

Importing bookings
- Go to the Schedules module and click More.
From the drop-down list, select Import time slots or bookings.
- In the import window, click Download template for booking. The file will be downloaded to your device. Prepare it by entering data.
Required data for importing bookings
- Operation time (it has to be the same as in the warehouse settings)
- Operation type (loading/unloading)
- Dock
- Warehouse
- Starting time (start of operation)
- Click Bookings and attach the file.

- After uploading the file, the values you entered will appear in the file import window (Data matching step).
When you receive a notification that the data has been successfully verified, click Add bookings.
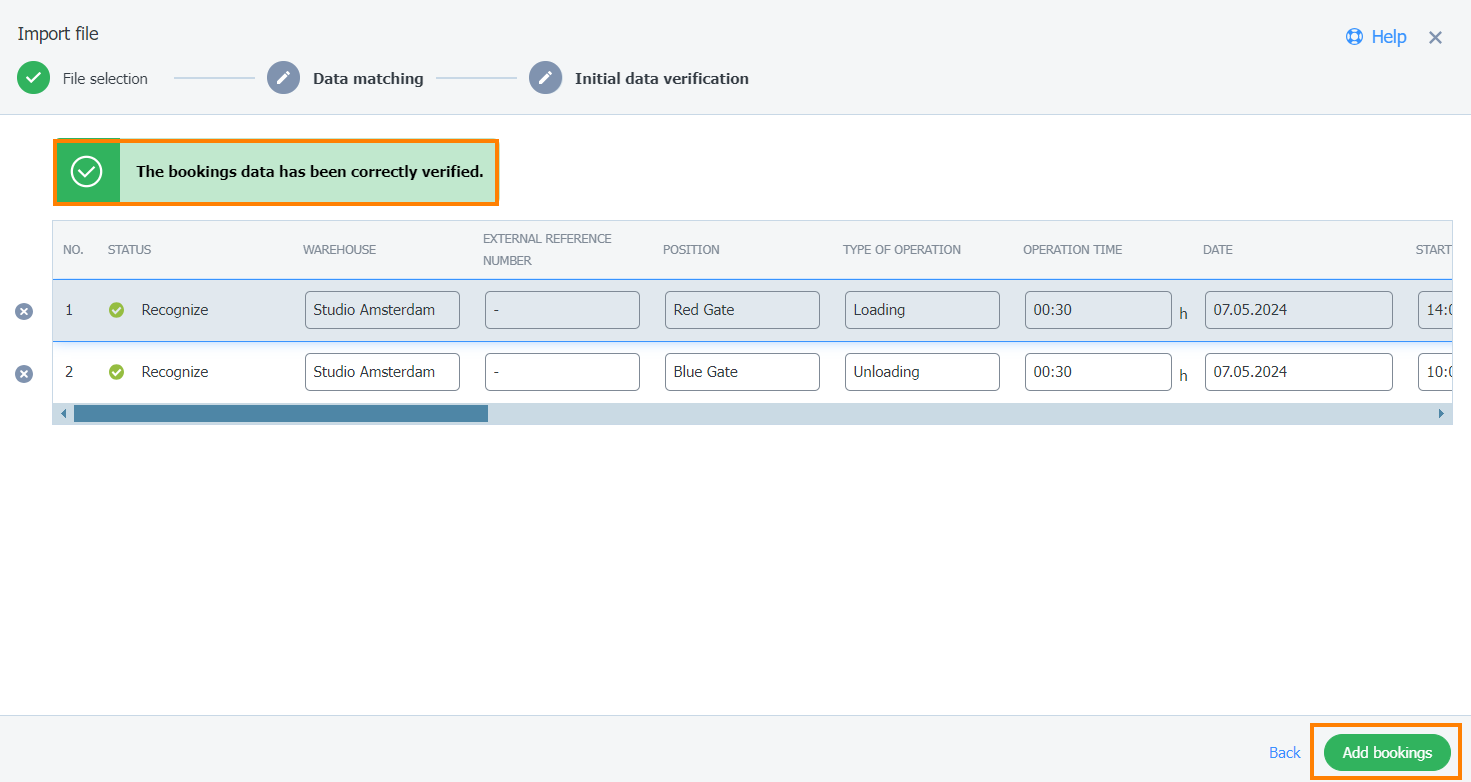
- After clicking Add bookings, a progress bar will be displayed.
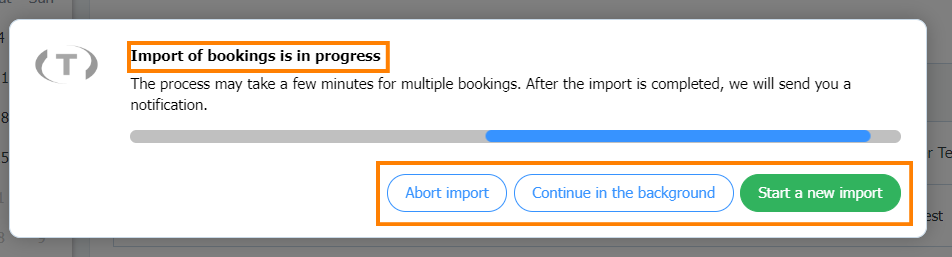
You can choose from the following actions: abort import, start a new import, or continue import in the background.
You will also receive notification that:
- files are being imported
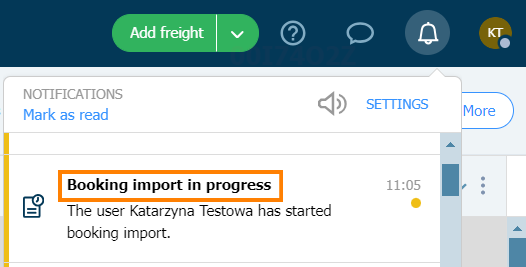
- import of the files has been finished.

- Once the import is finished, you will see a summary. Click Close.

- To check whether bookings have been imported, click Schedules and then Bookings.

- In the list of bookings you will see imported bookings.

Match templates
With mapping, you can specify where the data from the imported file should be assigned in Dock Scheduler. You can save your configuration as a match template. This will allow you to easily and quickly reuse your configuration.
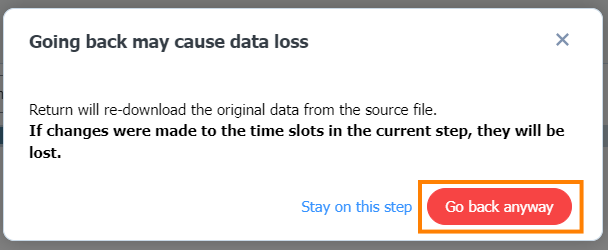
If the column scheme has been recognized automatically, you can go back and change it.
- Import the file and select Back.

- Confirm by clicking Go back anyway.
- In this step you can map the columns. Click on the column and select the value you are interested in from the Time slot data drop-down list.

- You can make future data imports easier by saving your mapping configurations as templates.
Click Save as template.

- Enter the name of the template and click Save.

- You will find the new template in the Match templates drop-down list.
